
1 line
63 KiB
JSON
1 line
63 KiB
JSON
{"repo": "appleboy/codegpt", "files": {"README.zh-tw.md": {"d711b9ebd9a75e95cc65caf6d595fcaf27f2667e": {"t": 1785674334.6537275, "n": 24903, "h": "6cb186d864f9e16e", "c": "# CodeGPT\n\n[](https://github.com/appleboy/CodeGPT/actions/workflows/testing.yml)\n[](https://github.com/appleboy/CodeGPT/actions/workflows/security.yml)\n[](https://github.com/appleboy/CodeGPT/actions/workflows/trivy.yml)\n[](https://codecov.io/gh/appleboy/CodeGPT)\n[](https://goreportcard.com/report/github.com/appleboy/CodeGPT)\n\n一個用 [Go](https://go.dev) 編寫的 CLI 工具,使用 ChatGPT AI (gpt-4o, gpt-4 模型) 生成 git 提交訊息或提供代碼審查摘要。它還會自動安裝 [git prepare-commit-msg hook](https://git-scm.com/docs/githooks)。\n\n- [繁體中文介紹][1]\n- [繁體中文影片][2]\n\n[English](./README.md) | **繁體中文** | [简体中文](./README.zh-cn.md)\n\n\n\n## 目錄\n\n- [CodeGPT](#codegpt)\n - [目錄](#目錄)\n - [功能](#功能)\n - [安裝](#安裝)\n - [macOS](#macos)\n - [Windows](#windows)\n - [腳本與二進位安裝](#腳本與二進位安裝)\n - [**A. 自動安裝(推薦)**](#a-自動安裝推薦)\n - [**B. 手動安裝(進階)**](#b-手動安裝進階)\n - [可設定的環境變數](#可設定的環境變數)\n - [從源碼安裝](#從源碼安裝)\n - [VSCode Devcontainer](#vscode-devcontainer)\n - [配置](#配置)\n - [使用 API Key Helper 動態獲取憑證](#使用-api-key-helper-動態獲取憑證)\n - [設置 API Key Helper](#設置-api-key-helper)\n - [配置刷新間隔](#配置刷新間隔)\n - [Gemini 專用 API Key Helper](#gemini-專用-api-key-helper)\n - [工作原理](#工作原理)\n - [優先順序](#優先順序)\n - [如何自定義默認提示文件夾](#如何自定義默認提示文件夾)\n - [如何切換到 Azure OpenAI 服務](#如何切換到-azure-openai-服務)\n - [支援 Gemini API 服務](#支援-gemini-api-服務)\n - [設定選項](#設定選項)\n - [範例:Gemini API(預設後端)](#範例gemini-api預設後端)\n - [範例:VertexAI Gemini](#範例vertexai-gemini)\n - [支援 Anthropic API 服務](#支援-anthropic-api-服務)\n - [如何切換到 Groq API 服務](#如何切換到-groq-api-服務)\n - [如何切換到 Ollama API 服務](#如何切換到-ollama-api-服務)\n - [如何切換到 OpenRouter API 服務](#如何切換到-openrouter-api-服務)\n - [使用方法](#使用方法)\n - [CLI 模式](#cli-模式)\n - [更改提交訊息模板](#更改提交訊息模板)\n - [Git Hook](#git-hook)\n - [Install(安裝)](#install安裝)\n - [Uninstall(解除安裝)](#uninstall解除安裝)\n - [程式碼審查(Code Review)](#程式碼審查code-review)\n - [測試(Testing)](#測試testing)\n - [Star History](#star-history)\n - [參考資料(Reference)](#參考資料reference)\n\n[1]: https://blog.wu-boy.com/2023/03/writes-git-commit-messages-using-chatgpt/\n[2]: https://www.youtube.com/watch?v=4Yei_t6eMZU\n\n\n\n## 功能\n\n- 支援 [Azure OpenAI Service](https://azure.microsoft.com/en-us/products/cognitive-services/openai-service)、[OpenAI API](https://platform.openai.com/docs/api-reference)、[Gemini][60]、[Anthropic][100]、[Ollama][41]、[Groq][30] 和 [OpenRouter][50]。\n- 遵循 [conventional commits 規範](https://www.conventionalcommits.org/en/v1.0.0/)。\n- 整合 Git prepare-commit-msg Hook,詳情請參閱 [Git Hooks 文件](https://git-scm.com/book/en/v2/Customizing-Git-Git-Hooks)。\n- 可透過指定上下文行數(預設:3)來自訂產生的差異內容。\n- 支援差異檔案排除模式(git diff)。\n- 將提交訊息翻譯為其他語言(支援 `en`、`zh-tw`、`zh-cn`)。\n- 支援 SOCKS 代理或自訂 HTTP 網路代理。\n- 生成簡潔的程式碼審查摘要。\n- 支援串流輸出,即時顯示生成的 token。\n- 允許自訂提示模板及變數。\n \n\n## 安裝\n\n### macOS\n\n透過 [Homebrew](http://brew.sh/) 安裝:\n\n```sh\nbrew tap appleboy/tap\nbrew install codegpt\n```\n\n### Windows\n\n透過 [Chocolatey](https://chocolatey.org/install) 安裝:\n\n```sh\nchoco install codegpt\n```\n\n### 腳本與二進位安裝\n\n大多數系統推薦使用安裝腳本自動安裝(推薦),亦可手動下載執行檔。\n\n#### **A. 自動安裝(推薦)**\n\n執行腳本,自動下載與安裝最新版:\n\n```sh\nbash < <(curl -sSL https://raw.githubusercontent.com/appleboy/CodeGPT/main/install.sh)\n```\n\n或手動下載腳本再執行:\n\n```sh\ncurl -LO https://raw.githubusercontent.com/appleboy/CodeGPT/main/install.sh\nchmod +x install.sh\n./install.sh\n```\n\n#### **B. 手動安裝(進階)**\n\n1. 從 [release 頁面](https://github.com/appleboy/CodeGPT/releases) 下載最新二進位檔案。\n2. 更改權限:\n\n ```sh\n chmod 755 codegpt\n ```\n\n3. 移動到 bin 目錄:\n\n ```sh\n mv codegpt /usr/local/bin/\n ```\n\n4. 驗證安裝:\n\n ```sh\n codegpt version\n ```\n\n#### 可設定的環境變數\n\n| 變數名稱 | 預設值 | 說明 |\n| ----------- | ------------------ | --------------------------------------------------- |\n| VERSION | latest | 要安裝的 CodeGPT 版本(預設為最新發布版) |\n| INSTALL_DIR | $HOME/.codegpt/bin | 安裝目錄 |\n| INSECURE | 未設定(預設停用) | 只要設定該變數(值不限),就會啟用跳過 SSL 驗證模式 |\n\n使用範例:\n\n```sh\n# 啟用 insecure 模式(忽略 SSL 驗證)\nINSECURE=1 ./install.sh\n\n# 安裝特定版本到自訂目錄\nVERSION=1.1.0 INSTALL_DIR=/opt/codegpt ./install.sh\n```\n\n此腳本會:\n\n1. 偵測您的作業系統與架構\n2. 下載最新版二進位檔案\n3. 將程式加入您的 PATH\n\n### 從源碼安裝\n\n從源碼安裝:\n\n```sh\ngo install github.com/appleboy/CodeGPT/cmd/codegpt@latest\n```\n\n### VSCode Devcontainer\n\n於 devcontainer.json 中新增 [feature](https://github.com/kvokka/features/tree/main/src/codegpt):\n\n```json\n\"features\": {\n \"ghcr.io/kvokka/features/codegpt:1\": {}\n}\n```\n\n## 配置\n\n首先,創建您的 OpenAI API Key。 [OpenAI 平台](https://platform.openai.com/account/api-keys) 允許您生成新的 API Key。\n\n\n\n設置環境變量 `OPENAI_API_KEY`:\n\n```sh\nexport OPENAI_API_KEY=sk-xxxxxxx\n```\n\n或者,將您的 API key 存儲在自定義配置文件中:\n\n```sh\ncodegpt config set openai.api_key sk-xxxxxxx\n```\n\n這將在您的主目錄中創建一個 `.codegpt.yaml` 文件($HOME/.config/codegpt/.codegpt.yaml)。以下選項可用:\n\n| 選項 | 描述 |\n| ------------------------------------------ | ------------------------------------------------------------------------------------------------------------------------------------------------------------------------- |\n| **openai.base_url** | 替換默認的基礎 URL (`https://api.openai.com/v1`)。 |\n| **openai.api_key** | 從 [openai 平台頁面](https://platform.openai.com/account/api-keys) 生成 API key。 |\n| **openai.api_key_helper** | 用於動態生成 API key 的 Shell 命令(例如從密碼管理器或密鑰服務獲取)。 |\n| **openai.api_key_helper_refresh_interval** | 從 `api_key_helper` 刷新憑證的間隔秒數(默認:`900` 秒 / 15 分鐘)。設置為 `0` 以禁用緩存。 |\n| **openai.org_id** | 在 API 請求中有時使用的組織標識符。請參閱 [組織設置](https://platform.openai.com/account/org-settings)。僅適用於 `openai` 服務。 |\n| **openai.model** | 默認模型是 `gpt-4o`,您可以更改為其他自定義模型(Groq 或 OpenRouter 提供者)。 |\n| **openai.proxy** | HTTP/HTTPS 客戶端代理。 |\n| **openai.socks** | SOCKS 客戶端代理。 |\n| **openai.timeout** | 默認 HTTP 超時為 `10s`(十秒)。 |\n| **openai.skip_verify** | 默認 skip_verify 是 `false` 你可以改為 `true` 以忽略 SSL 驗證。 |\n| **openai.max_tokens** | 默認最大 token 為 `300`。請參閱參考 [max_tokens](https://platform.openai.com/docs/api-reference/completions/create#completions/create-max_tokens)。 |\n| **openai.temperature** | 默認溫度為 `1`。請參閱參考 [temperature](https://platform.openai.com/docs/api-reference/completions/create#completions/create-temperature)。 |\n| **git.diff_unified** | 生成具有 `<n>` 行上下文的差異,默認為 `3`。 |\n| **git.exclude_list** | 從 `git diff` 命令中排除文件。 |\n| **openai.provider** | 默認服務提供者是 `openai`,您可以更改為 `azure`。 |\n| **output.lang** | 默認語言是 `en`,可用語言有 `zh-tw`、`zh-cn`、`ja`。 |\n| **openai.top_p** | 默認 top_p 為 `1.0`。請參閱參考 [top_p](https://platform.openai.com/docs/api-reference/completions/create#completions/create-top_p)。 |\n| **openai.frequency_penalty** | 默認 frequency_penalty 為 `0.0`。請參閱參考 [frequency_penalty](https://platform.openai.com/docs/api-reference/completions/create#completions/create-frequency_penalty)。 |\n| **openai.presence_penalty** | 默認 presence_penalty 為 `0.0`。請參閱參考 [presence_penalty](https://platform.openai.com/docs/api-reference/completions/create#completions/create-presence_penalty)。 |\n| **openai.stream** | 啟用串流輸出以即時顯示生成的 token,預設為 `false`。 |\n| **prompt.folder** | 默認提示文件夾是 `$HOME/.config/codegpt/prompt`。 |\n\n### 使用 API Key Helper 動態獲取憑證\n\n您可以使用 Shell 命令從密碼管理器或密鑰服務動態獲取 API key,而不是直接將其存儲在配置文件中。這特別適用於:\n\n- 從密碼管理器獲取密鑰(1Password、Bitwarden 等)\n- 使用雲端密鑰服務(AWS Secrets Manager、Google Secret Manager 等)\n- 實現密鑰輪換和短期憑證\n- 提高安全性,避免以明文存儲密鑰\n\n#### 設置 API Key Helper\n\n配置 Shell 命令來獲取您的 API key:\n\n```sh\n# 使用 1Password CLI\ncodegpt config set openai.api_key_helper \"op read op://vault/openai/api_key\"\n\n# 使用 AWS Secrets Manager\ncodegpt config set openai.api_key_helper \"aws secretsmanager get-secret-value --secret-id openai-key --query SecretString --output text\"\n\n# 使用 Google Cloud Secret Manager\ncodegpt config set openai.api_key_helper \"gcloud secrets versions access latest --secret=openai-api-key\"\n\n# 使用環境變數\ncodegpt config set openai.api_key_helper \"echo \\$MY_OPENAI_KEY\"\n\n# 自定義腳本\ncodegpt config set openai.api_key_helper \"/path/to/get-api-key.sh\"\n```\n\n#### 配置刷新間隔\n\n默認情況下,API key 會被緩存 15 分鐘(900 秒),以避免對密鑰服務的過度調用:\n\n```sh\n# 設置刷新間隔為 5 分鐘\ncodegpt config set openai.api_key_helper_refresh_interval 300\n\n# 設置刷新間隔為 30 分鐘\ncodegpt config set openai.api_key_helper_refresh_interval 1800\n\n# 禁用緩存(每次都重新獲取密鑰)\ncodegpt config set openai.api_key_helper_refresh_interval 0\n```\n\n#### Gemini 專用 API Key Helper\n\n對於 Gemini 提供者,您可以設置單獨的 helper:\n\n```sh\ncodegpt config set gemini.api_key_helper \"gcloud secrets versions access latest --secret=gemini-key\"\ncodegpt config set gemini.api_key_helper_refresh_interval 600\n```\n\n#### 工作原理\n\n1. **首次執行**:CodeGPT 運行您的 helper 命令並將 API key 緩存到 `~/.config/codegpt/.cache/`,文件權限為 0600(僅所有者可讀寫)\n2. **後續執行**:在刷新間隔內,CodeGPT 使用緩存的密鑰\n3. **過期後**:CodeGPT 自動重新運行 helper 命令並更新緩存\n4. **安全性**:緩存文件以僅所有者可讀寫的權限存儲\n\n#### 優先順序\n\n當配置了多個 API key 來源時,CodeGPT 使用以下優先順序:\n\n1. `openai.api_key_helper`(如果已配置)\n2. `openai.api_key`(靜態配置)\n3. `OPENAI_API_KEY` 環境變數\n\n### 如何自定義默認提示文件夾\n\n默認提示文件夾位於 `$HOME/.config/codegpt/prompt`。您可以通過執行以下命令將其更改為其他目錄:\n\n```sh\ncodegpt config set prompt.folder /path/to/your/prompt\n```\n\n要從自定義文件夾加載提示文件,請運行:\n\n```sh\ncodegpt prompt --load\n```\n\n執行後,您將看到類似以下的消息:\n\n```sh\nsave code_review_file_diff.tmpl to /Users/xxxxx/.config/codegpt/prompt/code_review_file_diff.tmpl\nsave summarize_file_diff.tmpl to /Users/xxxxx/.config/codegpt/prompt/summarize_file_diff.tmpl\nsave summarize_title.tmpl to /Users/xxxxx/.config/codegpt/prompt/summarize_title.tmpl\nsave conventional_commit.tmpl to /Users/xxxxx/.config/codegpt/prompt/conventional_commit.tmpl\n```\n\n- [code_review_file_diff.tmpl](./prompt/templates/code_review_file_diff.tmpl)\n- [summarize_file_diff.tmpl](./prompt/templates/summarize_file_diff.tmpl)\n- [summarize_title.tmpl](./prompt/templates/summarize_title.tmpl)\n- [conventional_commit.tmpl](./prompt/templates/conventional_commit.tmpl)\n\n### 如何切換到 Azure OpenAI 服務\n\n從 Azure 資源管理門戶左側菜單中獲取 `API key`、`Endpoint` 和 `Model deployments` 列表。\n\n\n\n\n\n更新您的配置文件:\n\n```sh\ncodegpt config set openai.provider azure\ncodegpt config set openai.base_url https://xxxxxxxxx.openai.azure.com/\ncodegpt config set openai.api_key xxxxxxxxxxxxxxxx\ncodegpt config set openai.model xxxxx-gpt-4o\n```\n\n### 支援 [Gemini][60] API 服務\n\n你可以使用 Gemini API 或 VertexAI Gemini 服務。請參閱 [Gemini API 文件][61] 與 [VertexAI 文件][63]。 \n請在設定檔中更新以下參數。\n\n- 請從 [Gemini API][62] 頁面(用於 BackendGeminiAPI)或 [VertexAI API Key][64](用於 BackendVertexAI)建立 API 金鑰。\n\n#### 設定選項\n\n| 選項 | 說明 | 範例值 | 必填 | 預設值 |\n| --------------------- | ------------------------------------------------------------------------------------------ | ------------------ | -------- | ------------------ |\n| **openai.provider** | 設為 `gemini` 以使用 Gemini 提供者 | `gemini` | 是 | |\n| **gemini.api_key** | Gemini 或 VertexAI 的 API 金鑰 | `xxxxxxx` | 是 | |\n| **gemini.model** | 模型名稱(參見 [Gemini 模型][61]) | `gemini-2.0-flash` | 是 | |\n| **gemini.backend** | Gemini 後端:`BackendGeminiAPI`(預設,適用於 Gemini API)或 `BackendVertexAI`(VertexAI) | `BackendGeminiAPI` | 否 | `BackendGeminiAPI` |\n| **gemini.project_id** | VertexAI 專案 ID(如使用 `BackendVertexAI` 必填) | `my-gcp-project` | 條件必填 | |\n| **gemini.location** | VertexAI 區域(如使用 `BackendVertexAI` 必填) | `us-central1` | 條件必填 | |\n\n#### 範例:Gemini API(預設後端)\n\n```sh\ncodegpt config set openai.provider gemini\ncodegpt config set gemini.api_key xxxxxxx\ncodegpt config set openai.model gemini-2.0-flash\n# gemini.backend 預設為 BackendGeminiAPI,可省略\n```\n\n#### 範例:VertexAI Gemini\n\n```sh\ncodegpt config set openai.provider gemini\ncodegpt config set openai.model gemini-1.5-pro-preview-0409\ncodegpt config set gemini.backend BackendVertexAI\ncodegpt config set gemini.project_id my-gcp-project\ncodegpt config set gemini.location us-central1\n```\n\n[60]: https://ai.google.dev/gemini-api\n[61]: https://ai.google.dev/gemini-api/docs\n[62]: https://aistudio.google.com/app/apikey\n[63]: https://cloud.google.com/vertex-ai/docs/generative-ai/learn/overview\n[64]: https://console.cloud.google.com/apis/credentials\n\n```mermaid\nflowchart TD\n User([使用者])\n subgraph CodeGPT\n GeminiClient([Gemini 提供者])\n end\n subgraph Google\n GeminiAPI([Gemini API])\n VertexAI([VertexAI Gemini])\n end\n\n User -->|Completion / GetSummaryPrefix| GeminiClient\n\n GeminiClient -- BackendGeminiAPI --> GeminiAPI\n GeminiAPI -- Response (text, usage) --> GeminiClient\n\n GeminiClient -- BackendVertexAI --> VertexAI\n VertexAI -- Response (text, usage) --> GeminiClient\n\n GeminiClient --> User\n```\n\n### 支援 [Anthropic][100] API 服務\n\n使用 Anthropic API 構建,您可以查看 [Anthropic API 文檔][101]。在您的配置文件中更新 `provider` 和 `api_key`。請從 [Anthropic API][102] 頁面創建 API key。\n\n```sh\ncodegpt config set openai.provider anthropic\ncodegpt config set openai.api_key xxxxxxx\ncodegpt config set openai.model claude-3-5-sonnet-20241022\n```\n\n請參閱 [Anthropic API 文檔][103] 中的模型列表。\n\n[100]: https://anthropic.com/\n[101]: https://docs.anthropic.com/en/home\n[102]: https://anthropic.com/\n[103]: https://docs.anthropic.com/en/docs/about-claude/models\n\n### 如何切換到 [Groq][30] API 服務\n\n從 Groq API 服務獲取 `API key`,請訪問 [此處][31]。在您的配置文件中更新 `base_url` 和 `api_key`。\n\n```sh\ncodegpt config set openai.provider openai\ncodegpt config set openai.base_url https://api.groq.com/openai/v1\ncodegpt config set openai.api_key gsk_xxxxxxxxxxxxxx\ncodegpt config set openai.model llama3-8b-8192\n```\n\nGroqCloud 目前支援 [以下模型][32]:\n\n1. [生產模型](https://console.groq.com/docs/models#production-models)\n2. [預覽模型](https://console.groq.com/docs/models#preview-models)\n\n[30]: https://groq.com/\n[31]: https://console.groq.com/keys\n[32]: https://console.groq.com/docs/models\n\n### 如何切換到 Ollama API 服務\n\n我們可以使用 [Ollama][41] API 服務的 Llama3 模型,請訪問 [此處][40]。在您的配置文件中更新 `base_url`。\n\n[40]: https://github.com/ollama/ollama/blob/main/docs/openai.md#models\n[41]: https://github.com/ollama/ollama\n\n```sh\n# pull llama3 8b model\nollama pull llama3\nollama cp llama3 gpt-4o\n```\n\n嘗試使用 `Ollama` API 服務:\n\n```sh\ncurl http://localhost:11434/v1/chat/completions \\\n -H \"Content-Type: application/json\" \\\n -d '{\n \"model\": \"gpt-4o\",\n \"messages\": [\n {\n \"role\": \"user\",\n \"content\": \"Hello!\"\n }\n ]\n }'\n```\n\n在您的配置文件中更新 `base_url`。您不需要在配置文件中設置 `api_key`。\n\n```sh\ncodegpt config set openai.base_url http://localhost:11434/v1\n```\n\n### 如何切換到 [OpenRouter][50] API 服務\n\n您可以查看 [支援的模型列表][51],模型使用可以由用戶、開發者或兩者支付,並且可能會在 [可用性][52] 上發生變化。您還可以通過 API [獲取模型、價格和限制][53]。\n\n以下示例使用免費模型名稱:`meta-llama/llama-3-8b-instruct:free`\n\n```sh\ncodegpt config set openai.provider openai\ncodegpt config set openai.base_url https://openrouter.ai/api/v1\ncodegpt config set openai.api_key sk-or-v1-xxxxxxxxxxxxxxxx\ncodegpt config set openai.model google/gemini-3-flash-preview\n```\n\n[50]: https://openrouter.ai/\n[51]: https://openrouter.ai/docs#models\n[52]: https://openrouter.ai/terms#services\n[53]: https://openrouter.ai/api/v1/models\n\n要將您的應用程序包含在 openrouter.ai 排名中並在 openrouter.ai 上顯示,您可以在配置文件中設置 `openai.headers`:\n\n```sh\ncodegpt config set openai.headers \"HTTP-Referer=https://github.com/appleboy/CodeGPT X-Title=CodeGPT\"\n```\n\n- **HTTP-Referer**:可選,用於將您的應用程序包含在 openrouter.ai 排名中。\n- **X-Title**:可選,用於在 openrouter.ai 上顯示排名。\n\n## 使用方法\n\n有兩種使用 `codegpt` 命令生成提交訊息的方法:CLI 模式和 Git Hook。\n\n### CLI 模式\n\n您可以直接調用 `codegpt` 來為您的暫存更改生成提交訊息:\n\n```sh\ngit add <files...>\ncodegpt commit --preview\n```\n\n提交訊息如下所示:\n\n```sh\n使用 gpt-4o 模型總結提交訊息\n我們正在嘗試總結 git 差異\n我們正在嘗試總結拉取請求的標題\n================提交摘要====================\n\nfeat(cmd): 在 commit 命令和模板文件中添加預覽標記並移除 disableCommit 標記。\n\n- 在 `commit` 命令中添加 `preview` 標記\n- 從 `prepare-commit-msg` 模板文件中移除 `disableCommit` 標記\n\n==================================================\n將提交訊息寫入 .git/COMMIT_EDITMSG 文件\n```\n\n或者將所有 git 提交訊息翻譯成其他語言(`繁體中文`、`簡體中文` 或 `日文`):\n\n```sh\ncodegpt commit --lang zh-tw --preview\n```\n\n考慮以下結果:\n\n```sh\n使用 gpt-4o 模型總結提交訊息\n我們正在嘗試總結 git 差異\n我們正在嘗試總結拉取請求的標題\n我們正在嘗試將 git 提交訊息翻譯成繁體中文\n================提交摘要====================\n\n功能:重構 codegpt commit 命令標記\n\n- 將「codegpt commit」命令新增「預覽」標記\n- 從「codegpt commit」命令中移除「--disableCommit」標記\n\n==================================================\n將提交訊息寫入 .git/COMMIT_EDITMSG 文件\n```\n\n您可以使用 `--amend` 標記創建新提交來替換當前分支的頂端:\n\n```sh\ncodegpt commit --amend\n```\n\n啟用串流輸出,即時顯示生成的 token,無需等待完整回應:\n\n```sh\ncodegpt commit --stream\n```\n\n或透過全域設定啟用:\n\n```sh\ncodegpt config set openai.stream true\n```\n\n`--stream` 參數同樣適用於 `review` 命令:\n\n```sh\ncodegpt review --stream\n```\n\n## Agent 技能整合\n\nCodeGPT 提供了 Agent 技能,例如 `/commit-message`,可從暫存的變更自動產生符合慣例的提交訊息。在 [Claude Code](https://docs.anthropic.com/en/docs/claude-code) 中輸入 `/commit-message`,即可分析暫存的差異並產生包含適當前綴、範圍和摘要的提交訊息。\n\n技能定義維護於獨立的儲存庫:[appleboy/skills](https://github.com/appleboy/skills)。\n\n## 更改提交訊息模板\n\n默認的提交訊息模板如下。`summarize_prefix` 變數會輸出包含範圍的慣例提交前綴,格式為 `prefix(scope)`(例如 `feat(cmd)`、`fix(git)`、`docs(readme)`):\n\n```tmpl\n{{ .summarize_prefix }}: {{ .summarize_title }}\n\n{{ .summarize_message }}\n```\n\n使用 `--template_string` 參數更改格式:\n\n```sh\ncodegpt commit --preview --template_string \\\n \"[{{ .summarize_prefix }}]: {{ .summarize_title }}\"\n```\n\n使用 `--template_file` 參數更改格式:\n\n```sh\ncodegpt commit --preview --template_file your_file_path\n```\n\n將自定義變量添加到 git 提交訊息模板:\n\n```sh\n{{ .summarize_prefix }}: {{ .summarize_title }}\n\n{{ .summarize_message }}\n\n{{ if .JIRA_URL }}{{ .JIRA_URL }}{{ end }}\n```\n\n使用 `--template_vars` 參數將自定義變量添加到 git 提交訊息模板:\n\n```sh\ncodegpt commit --preview --template_file your_file_path --template_vars \\\n JIRA_URL=https://jira.example.com/ABC-123\n```\n\n使用 `--template_vars_file` 參數從文件加載自定義變量:\n\n```sh\ncodegpt commit --preview --template_file your_file_path --template_vars_file your_file_path\n```\n\n請參閱 `template_vars_file` 格式如下:\n\n```env\nJIRA_URL=https://jira.example.com/ABC-123\n```\n\n### Git Hook\n\n你也可以使用 prepare-commit-msg 鉤子將 `codegpt` 與 Git 集成。這允許你正常使用 Git 並在提交之前編輯提交訊息。\n\n#### Install(安裝)\n\n你需要在 Git 儲存庫中安裝鉤子:\n\n```sh\ncodegpt hook install\n```\n\n#### Uninstall(解除安裝)\n\n你需要從 Git 儲存庫中移除鉤子:\n\n```sh\ncodegpt hook uninstall\n```\n\n將文件暫存並在安裝後提交:\n\n```sh\ngit add <files...>\ngit commit\n```\n\n`codegpt` 將為你生成提交訊息並將其傳回給 Git。Git 將使用配置的編輯器打開它供你審查/編輯。然後,保存並關閉編輯器以提交!\n\n```sh\n$ git commit\nSummarize the commit message use gpt-4o model\nWe are trying to summarize a git diff\nWe are trying to summarize a title for pull request\n================Commit Summary====================\n\nImprove user experience and documentation for OpenAI tools\n\n- Add download links for pre-compiled binaries\n- Include instructions for setting up OpenAI API key\n- Add a CLI mode for generating commit messages\n- Provide references for OpenAI Chat completions and ChatGPT/Whisper APIs\n\n==================================================\nWrite the commit message to .git/COMMIT_EDITMSG file\n[main 6a9e879] Improve user experience and documentation for OpenAI tools\n 1 file changed, 56 insertions(+)\n```\n\n### 程式碼審查(Code Review)\n\n你可以使用 `codegpt` 為你已暫存的更改生成程式碼審查訊息:\n\n```sh\ncodegpt review\n```\n\n或將所有程式碼審查訊息翻譯成其他語言(`繁體中文`、`簡體中文` 或 `日文`)\n\n```sh\ncodegpt review --lang zh-tw\n```\n\n請參閱以下結果:\n\n```sh\nCode review your changes using gpt-4o model\nWe are trying to review code changes\nPromptTokens: 1021, CompletionTokens: 200, TotalTokens: 1221\nWe are trying to translate core review to Traditional Chinese language\nPromptTokens: 287, CompletionTokens: 199, TotalTokens: 486\n================Review Summary====================\n\n總體而言,此程式碼修補似乎在增加 Review 指令的功能,允許指定輸出語言並在必要時進行翻譯。以下是需要考慮的潛在問題:\n\n- 輸出語言沒有進行輸入驗證。如果指定了無效的語言代碼,程式可能會崩潰或產生意外結果。\n- 此使用的翻譯 API 未指定,因此不清楚是否存在任何安全漏洞。\n- 無法處理翻譯 API 調用的錯誤。如果翻譯服\n\n==================================================\n```\n\n另一個 PHP 範例代碼:\n\n```php\n<?php\nif( isset( $_POST[ 'Submit' ] ) ) {\n // Get input\n $target = $_REQUEST[ 'ip' ];\n // Determine OS and execute the ping command.\n if( stristr( php_uname( 's' ), 'Windows NT' ) ) {\n // Windows\n $cmd = shell_exec( 'ping ' . $target );\n }\n else {\n // *nix\n $cmd = shell_exec( 'ping -c 4 ' . $target );\n }\n // Feedback for the end user\n $html .= \"<pre>{$cmd}</pre>\";\n}\n?>\n```\n\n程式碼審查結果:\n\n```sh\n================Review Summary====================\n\nCode review:\n\n1. Security: The code is vulnerable to command injection attacks as the user input is directly used in the shell_exec() function. An attacker can potentially execute malicious commands on the server by injecting them into the 'ip' parameter.\n2. Error handling: There is no error handling in the code. If the ping command fails, the error message is not displayed to the user.\n3. Input validation: There is no input validation for the 'ip' parameter. It should be validated to ensure that it is a valid IP address or domain name.\n4. Cross-platform issues: The code assumes that the server is either running Windows or *nix operating systems. It may not work correctly on other platforms.\n\nSuggestions for improvement:\n\n1. Use escapeshellarg() function to sanitize the user input before passing it to shell_exec() function to prevent command injection.\n2. Implement error handling to display error messages to the user if the ping command fails.\n3. Use a regular expression to validate the 'ip' parameter to ensure that it is a valid IP address or domain name.\n4. Use a more robust method to determine the operating system, such as the PHP_OS constant, which can detect a wider range of operating systems.\n\n==================================================\n```\n\n## 測試(Testing)\n\n運行以下命令來測試代碼:\n\n```sh\nmake test\n```\n\n## Star History\n\n[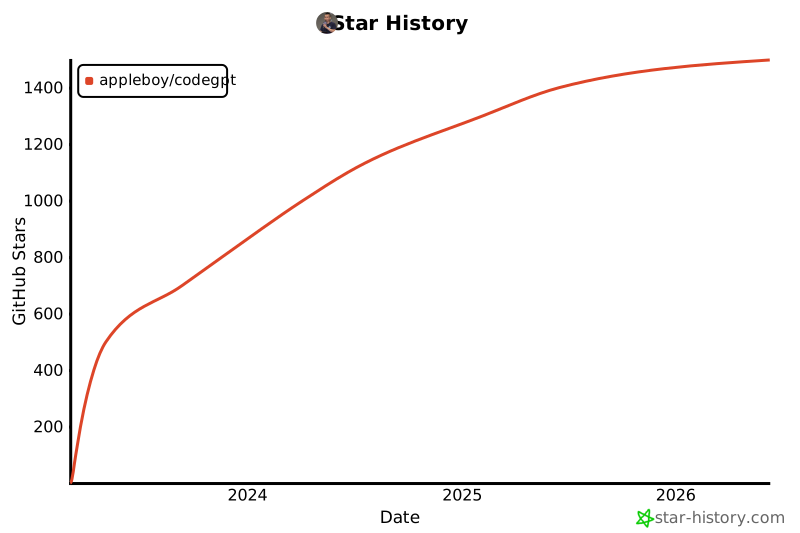](https://star-history.com/#appleboy/codegpt&Date)\n\n## 參考資料(Reference)\n\n- [OpenAI Chat completions documentation](https://platform.openai.com/docs/guides/chat).\n- [Introducing ChatGPT and Whisper APIs](https://openai.com/blog/introducing-chatgpt-and-whisper-apis)\n"}}, "README.md": {"d711b9ebd9a75e95cc65caf6d595fcaf27f2667e": {"t": 1785674337.3946073, "n": 31427, "h": "892c8611afdbad61", "c": "# CodeGPT\n\n[](https://github.com/appleboy/CodeGPT/actions/workflows/testing.yml)\n[](https://github.com/appleboy/CodeGPT/actions/workflows/security.yml)\n[](https://github.com/appleboy/CodeGPT/actions/workflows/trivy.yml)\n[](https://codecov.io/gh/appleboy/CodeGPT)\n[](https://goreportcard.com/report/github.com/appleboy/CodeGPT)\n\nA CLI tool written in [Go](https://go.dev) that generates git commit messages or provides code review summaries using ChatGPT AI (gpt-5, gpt-4o, gpt-4 model). It also automatically installs a [git prepare-commit-msg hook](https://git-scm.com/docs/githooks).\n\n- [繁體中文介紹][1]\n- [繁體中文影片][2]\n\n**English** | [繁體中文](./README.zh-tw.md) | [简体中文](./README.zh-cn.md)\n\n\n\n## Table of Contents\n\n- [CodeGPT](#codegpt)\n - [Table of Contents](#table-of-contents)\n - [Features](#features)\n - [Installation](#installation)\n - [macOS](#macos)\n - [Windows](#windows)\n - [Install via Script or Binary](#install-via-script-or-binary)\n - [**A. Automated Install (Recommended)**](#a-automated-install-recommended)\n - [**B. Manual Install (Advanced)**](#b-manual-install-advanced)\n - [Configurable Environment Variables](#configurable-environment-variables)\n - [From Source](#from-source)\n - [Using VSCode Devcontainer](#using-vscode-devcontainer)\n - [Configuration](#configuration)\n - [Using API Key Helper for Dynamic Credentials](#using-api-key-helper-for-dynamic-credentials)\n - [Setup API Key Helper](#setup-api-key-helper)\n - [Configure Refresh Interval](#configure-refresh-interval)\n - [Gemini-Specific API Key Helper](#gemini-specific-api-key-helper)\n - [How It Works](#how-it-works)\n - [Priority Order](#priority-order)\n - [How to Customize the Default Prompt Folder](#how-to-customize-the-default-prompt-folder)\n - [How to Change to Azure OpenAI Service](#how-to-change-to-azure-openai-service)\n - [Support for Gemini API Service](#support-for-gemini-api-service)\n - [Configuration Options](#configuration-options)\n - [Example: Gemini API (default backend)](#example-gemini-api-default-backend)\n - [Example: VertexAI Gemini](#example-vertexai-gemini)\n - [Support for Anthropic API Service](#support-for-anthropic-api-service)\n - [How to Change to Groq API Service](#how-to-change-to-groq-api-service)\n - [How to Change to Ollama API Service](#how-to-change-to-ollama-api-service)\n - [How to Change to OpenRouter API Service](#how-to-change-to-openrouter-api-service)\n - [Usage](#usage)\n - [CLI Mode](#cli-mode)\n - [Change Commit Message Template](#change-commit-message-template)\n - [Git Hook](#git-hook)\n - [Install](#install)\n - [Uninstall](#uninstall)\n - [Code Review](#code-review)\n - [Testing](#testing)\n - [Star History](#star-history)\n - [Reference](#reference)\n\n[1]: https://blog.wu-boy.com/2023/03/writes-git-commit-messages-using-chatgpt/\n[2]: https://www.youtube.com/watch?v=4Yei_t6eMZU\n\n\n\n## Features\n\n- Supports [Azure OpenAI Service](https://azure.microsoft.com/en-us/products/cognitive-services/openai-service), [OpenAI API](https://platform.openai.com/docs/api-reference), [Gemini][60], [Anthropic][100], [Ollama][41], [Groq][30], and [OpenRouter][50].\n- Adheres to the [conventional commits specification](https://www.conventionalcommits.org/en/v1.0.0/).\n- Integrates with Git prepare-commit-msg Hook, see the [Git Hooks documentation](https://git-scm.com/book/en/v2/Customizing-Git-Git-Hooks).\n- Allows customization of generated diffs by specifying the number of context lines (default: 3).\n- Enables file exclusion patterns for git diff operations.\n- Translates commit messages into other languages (supports `en`, `zh-tw`, or `zh-cn`).\n- Supports SOCKS proxy or custom network HTTP proxy.\n- Generates brief code reviews.\n- Supports streaming output for real-time token display.\n- Allows customization of prompt templates and variables.\n\n\n\n## Installation\n\n### macOS\n\nInstall via [Homebrew](http://brew.sh/):\n\n```sh\nbrew tap appleboy/tap\nbrew install codegpt\n```\n\n### Windows\n\nInstall via [Chocolatey](https://chocolatey.org/install):\n\n```sh\nchoco install codegpt\n```\n\n### Install via Script or Binary\n\nFor most systems, you can use an install script **or** manually download a pre-compiled binary.\n\n#### **A. Automated Install (Recommended)**\n\nRun the install script to automatically download and set up the latest release:\n\n```sh\nbash < <(curl -sSL https://raw.githubusercontent.com/appleboy/CodeGPT/main/install.sh)\n```\n\nOr download and run manually:\n\n```sh\ncurl -LO https://raw.githubusercontent.com/appleboy/CodeGPT/main/install.sh\nchmod +x install.sh\n./install.sh\n```\n\n#### **B. Manual Install (Advanced)**\n\n1. Download the latest pre-compiled binary from the [release page](https://github.com/appleboy/CodeGPT/releases).\n2. Change permissions:\n\n ```sh\n chmod 755 codegpt\n ```\n\n3. Move the binary to your system bin directory:\n\n ```sh\n mv codegpt /usr/local/bin/\n ```\n\n4. Confirm installation:\n\n ```sh\n codegpt version\n ```\n\n#### Configurable Environment Variables\n\n| Variable Name | Default Value | Description |\n| ------------- | ------------------ | ----------------------------------------------------------------------------- |\n| VERSION | latest | The CodeGPT version to install (defaults to latest release) |\n| INSTALL_DIR | $HOME/.codegpt/bin | Installation directory |\n| INSECURE | unset (disabled) | If set to any value, skips SSL verification. Enabled when variable is present |\n\nExample usage:\n\n```sh\n# Install with insecure mode enabled (ignoring curl SSL verification):\nINSECURE=1 ./install.sh\n\n# Install a specific version to a custom directory:\nVERSION=1.1.0 INSTALL_DIR=/opt/codegpt ./install.sh\n```\n\nThe script will:\n\n1. Detect your OS and architecture\n2. Download the latest binary\n3. Add the binary to your PATH\n\n### From Source\n\nInstall from source code:\n\n```sh\ngo install github.com/appleboy/CodeGPT/cmd/codegpt@latest\n```\n\n### Using VSCode Devcontainer\n\nAdd the [feature](https://github.com/kvokka/features/tree/main/src/codegpt) to your `devcontainer.json`:\n\n```json\n\"features\": {\n \"ghcr.io/kvokka/features/codegpt:1\": {}\n}\n```\n\n## Configuration\n\nFirst, create your OpenAI API Key. The [OpenAI Platform](https://platform.openai.com/account/api-keys) allows you to generate a new API Key.\n\n\n\nSet the environment variable `OPENAI_API_KEY`:\n\n```sh\nexport OPENAI_API_KEY=sk-xxxxxxx\n```\n\nAlternatively, store your API key in a custom config file:\n\n```sh\ncodegpt config set openai.api_key sk-xxxxxxx\n```\n\nThis will create a `.codegpt.yaml` file in your home directory ($HOME/.config/codegpt/.codegpt.yaml). The following options are available:\n\n| Option | Description |\n| ------------------------------------------ | ------------------------------------------------------------------------------------------------------------------------------------------------------------------------------ |\n| **openai.base_url** | Replace the default base URL (`https://api.openai.com/v1`). |\n| **openai.api_key** | Generate API key from [openai platform page](https://platform.openai.com/account/api-keys). |\n| **openai.api_key_helper** | Shell command to dynamically generate API key (e.g., from password manager or secret service). |\n| **openai.api_key_helper_refresh_interval** | Interval in seconds to refresh credentials from `api_key_helper` (default: `900` seconds / 15 minutes). Set to `0` to disable caching. |\n| **openai.org_id** | Identifier for this organization sometimes used in API requests. See [organization settings](https://platform.openai.com/account/org-settings). Only for `openai` service. |\n| **openai.model** | Default model is `gpt-4o`, you can change to other custom model (Groq or OpenRouter provider). |\n| **openai.proxy** | HTTP/HTTPS client proxy. |\n| **openai.socks** | SOCKS client proxy. |\n| **openai.timeout** | Default HTTP timeout is `10s` (ten seconds). |\n| **openai.skip_verify** | Default skip_verify is `false`, You can change it to `true` to ignore SSL verification. |\n| **openai.max_tokens** | Default max tokens is `300`. See reference [max_tokens](https://platform.openai.com/docs/api-reference/completions/create#completions/create-max_tokens). |\n| **openai.temperature** | Default temperature is `1`. See reference [temperature](https://platform.openai.com/docs/api-reference/completions/create#completions/create-temperature). |\n| **git.diff_unified** | Generate diffs with `<n>` lines of context, default is `3`. |\n| **git.exclude_list** | Exclude file from `git diff` command. |\n| **openai.provider** | Default service provider is `openai`, you can change to `azure`. |\n| **output.lang** | Default language is `en` and available languages `zh-tw`, `zh-cn`, `ja`. |\n| **openai.top_p** | Default top_p is `1.0`. See reference [top_p](https://platform.openai.com/docs/api-reference/completions/create#completions/create-top_p). |\n| **openai.frequency_penalty** | Default frequency_penalty is `0.0`. See reference [frequency_penalty](https://platform.openai.com/docs/api-reference/completions/create#completions/create-frequency_penalty). |\n| **openai.presence_penalty** | Default presence_penalty is `0.0`. See reference [presence_penalty](https://platform.openai.com/docs/api-reference/completions/create#completions/create-presence_penalty). |\n| **openai.stream** | Enable streaming output for real-time token display, default is `false`. |\n| **prompt.folder** | Default prompt folder is `$HOME/.config/codegpt/prompt`. |\n\n### Using API Key Helper for Dynamic Credentials\n\nInstead of storing your API key directly in the config file, you can use a shell command to dynamically retrieve it from a password manager or secret service. This is especially useful for:\n\n- Fetching keys from password managers (1Password, Bitwarden, etc.)\n- Using cloud secret services (AWS Secrets Manager, Google Secret Manager, etc.)\n- Implementing token rotation and short-lived credentials\n- Enhancing security by not storing keys in plain text\n\n#### Setup API Key Helper\n\nConfigure a shell command to retrieve your API key:\n\n```sh\n# Using 1Password CLI\ncodegpt config set openai.api_key_helper \"op read op://vault/openai/api_key\"\n\n# Using AWS Secrets Manager\ncodegpt config set openai.api_key_helper \"aws secretsmanager get-secret-value --secret-id openai-key --query SecretString --output text\"\n\n# Using Google Cloud Secret Manager\ncodegpt config set openai.api_key_helper \"gcloud secrets versions access latest --secret=openai-api-key\"\n\n# Using environment variable\ncodegpt config set openai.api_key_helper \"echo \\$MY_OPENAI_KEY\"\n\n# Custom script\ncodegpt config set openai.api_key_helper \"/path/to/get-api-key.sh\"\n```\n\n#### Configure Refresh Interval\n\nBy default, the API key is cached for 15 minutes (900 seconds) to avoid excessive calls to your secret service:\n\n```sh\n# Set refresh interval to 5 minutes\ncodegpt config set openai.api_key_helper_refresh_interval 300\n\n# Set refresh interval to 30 minutes\ncodegpt config set openai.api_key_helper_refresh_interval 1800\n\n# Disable caching (fetch key every time)\ncodegpt config set openai.api_key_helper_refresh_interval 0\n```\n\n#### Gemini-Specific API Key Helper\n\nFor Gemini provider, you can set a separate helper:\n\n```sh\ncodegpt config set gemini.api_key_helper \"gcloud secrets versions access latest --secret=gemini-key\"\ncodegpt config set gemini.api_key_helper_refresh_interval 600\n```\n\n#### How It Works\n\n1. **First execution**: CodeGPT runs your helper command and caches the API key in `~/.config/codegpt/.cache/` with restrictive permissions (0600)\n2. **Subsequent executions**: Within the refresh interval, CodeGPT uses the cached key\n3. **After expiration**: CodeGPT automatically re-runs the helper command and updates the cache\n4. **Security**: Cache files are stored with owner-only read/write permissions\n\n#### Priority Order\n\nWhen multiple API key sources are configured, CodeGPT uses this priority:\n\n1. `openai.api_key_helper` (if configured)\n2. `openai.api_key` (static config)\n3. `OPENAI_API_KEY` environment variable\n\n### How to Customize the Default Prompt Folder\n\nThe default prompt folder is located at `$HOME/.config/codegpt/prompt`. You can change this to another directory by executing:\n\n```sh\ncodegpt config set prompt.folder /path/to/your/prompt\n```\n\nTo load the prompt files from the custom folder, run:\n\n```sh\ncodegpt prompt --load\n```\n\nUpon execution, you will see messages similar to the following:\n\n```sh\nsave code_review_file_diff.tmpl to /Users/xxxxx/.config/codegpt/prompt/code_review_file_diff.tmpl\nsave summarize_file_diff.tmpl to /Users/xxxxx/.config/codegpt/prompt/summarize_file_diff.tmpl\nsave summarize_title.tmpl to /Users/xxxxx/.config/codegpt/prompt/summarize_title.tmpl\nsave conventional_commit.tmpl to /Users/xxxxx/.config/codegpt/prompt/conventional_commit.tmpl\n```\n\n- [code_review_file_diff.tmpl](./prompt/templates/code_review_file_diff.tmpl)\n- [summarize_file_diff.tmpl](./prompt/templates/summarize_file_diff.tmpl)\n- [summarize_title.tmpl](./prompt/templates/summarize_title.tmpl)\n- [conventional_commit.tmpl](./prompt/templates/conventional_commit.tmpl)\n\n### How to Change to Azure OpenAI Service\n\nGet the `API key`, `Endpoint`, and `Model deployments` list from the Azure Resource Management Portal on the left menu.\n\n\n\n\n\nUpdate your config file:\n\n```sh\ncodegpt config set openai.provider azure\ncodegpt config set openai.base_url https://xxxxxxxxx.openai.azure.com/\ncodegpt config set openai.api_key xxxxxxxxxxxxxxxx\ncodegpt config set openai.model xxxxx-gpt-4o\n```\n\n### Support for [Gemini][60] API Service\n\nYou can use the Gemini API or VertexAI Gemini service. See the [Gemini API documentation][61] and [VertexAI documentation][63]. \nUpdate the following parameters in your config file.\n\n- Please create an API key from the [Gemini API][62] page (for BackendGeminiAPI) or from [VertexAI API Key][64] (for BackendVertexAI).\n\n#### Configuration Options\n\n| Option | Description | Example Value | Required | Default |\n| --------------------- | ------------------------------------------------------------------------------------------------ | ------------------ | -------- | ------------------ |\n| **openai.provider** | Set to `gemini` to use Gemini provider | `gemini` | Yes | |\n| **gemini.api_key** | API key for Gemini or VertexAI | `xxxxxxx` | Yes | |\n| **gemini.model** | Model name (see [Gemini models][61]) | `gemini-2.0-flash` | Yes | |\n| **gemini.backend** | Gemini backend: `BackendGeminiAPI` (default, for Gemini API) or `BackendVertexAI` (for VertexAI) | `BackendGeminiAPI` | No | `BackendGeminiAPI` |\n| **gemini.project_id** | VertexAI project ID (required if using `BackendVertexAI`) | `my-gcp-project` | Cond. | |\n| **gemini.location** | VertexAI location (required if using `BackendVertexAI`) | `us-central1` | Cond. | |\n\n#### Example: Gemini API (default backend)\n\n```sh\ncodegpt config set openai.provider gemini\ncodegpt config set openai.model gemini-2.0-flash\ncodegpt config set gemini.api_key xxxxxxx\n# gemini.backend defaults to BackendGeminiAPI, so you can omit it\n```\n\n#### Example: VertexAI Gemini\n\n```sh\ncodegpt config set openai.provider gemini\ncodegpt config set openai.model gemini-2.0-flash\ncodegpt config set gemini.backend BackendVertexAI\ncodegpt config set gemini.project_id my-gcp-project\ncodegpt config set gemini.location us-central1\n```\n\n[60]: https://ai.google.dev/gemini-api\n[61]: https://ai.google.dev/gemini-api/docs\n[62]: https://aistudio.google.com/app/apikey\n[63]: https://cloud.google.com/vertex-ai/docs/generative-ai/learn/overview\n[64]: https://console.cloud.google.com/apis/credentials\n\n```mermaid\nflowchart TD\n User([User])\n subgraph CodeGPT\n GeminiClient([Gemini Provider])\n end\n subgraph Google\n GeminiAPI([Gemini API])\n VertexAI([VertexAI Gemini])\n end\n\n User -->|Completion / GetSummaryPrefix| GeminiClient\n\n GeminiClient -- BackendGeminiAPI --> GeminiAPI\n GeminiAPI -- Response (text, usage) --> GeminiClient\n\n GeminiClient -- BackendVertexAI --> VertexAI\n VertexAI -- Response (text, usage) --> GeminiClient\n\n GeminiClient --> User\n```\n\n### Support for [Anthropic][100] API Service\n\nBuild with the Anthropic API, you can see the [Anthropic API documentation][101]. Update the `provider` and `api_key` in your config file. Please create an API key from the [Anthropic API][102] page.\n\n```sh\ncodegpt config set openai.provider anthropic\ncodegpt config set openai.api_key xxxxxxx\ncodegpt config set openai.model claude-3-5-sonnet-20241022\n```\n\nSee the model list from the [Anthropic API documentation][103].\n\n[100]: https://anthropic.com/\n[101]: https://docs.anthropic.com/en/home\n[102]: https://anthropic.com/\n[103]: https://docs.anthropic.com/en/docs/about-claude/models\n\n### How to Change to [Groq][30] API Service\n\nGet the `API key` from the Groq API Service by visiting the [Groq API Service][31]. Update the `base_url` and `api_key` in your config file.\n\n```sh\ncodegpt config set openai.provider openai\ncodegpt config set openai.base_url https://api.groq.com/openai/v1\ncodegpt config set openai.api_key gsk_xxxxxxxxxxxxxx\ncodegpt config set openai.model llama3-8b-8192\n```\n\nGroqCloud currently supports the [following models][32]:\n\n1. [Production Models](https://console.groq.com/docs/models#production-models)\n2. [Preview Models](https://console.groq.com/docs/models#preview-models)\n\n[30]: https://groq.com/\n[31]: https://console.groq.com/keys\n[32]: https://console.groq.com/docs/models\n\n### How to Change to Ollama API Service\n\nWe can use the Llama3 model from the [Ollama][41] API Service; please visit the [Ollama API Models documentation][40]. Update the `base_url` in your config file.\n\n[40]: https://github.com/ollama/ollama/blob/main/docs/openai.md#models\n[41]: https://github.com/ollama/ollama\n\n```sh\n# pull llama3 8b model\nollama pull llama3\nollama cp llama3 gpt-4o\n```\n\nTry to use the `Ollama` API Service:\n\n```sh\ncurl http://localhost:11434/v1/chat/completions \\\n -H \"Content-Type: application/json\" \\\n -d '{\n \"model\": \"gpt-4o\",\n \"messages\": [\n {\n \"role\": \"user\",\n \"content\": \"Hello!\"\n }\n ]\n }'\n```\n\nUpdate the `base_url` in your config file. You don't need to set the `api_key` in the config file.\n\n```sh\ncodegpt config set openai.base_url http://localhost:11434/v1\n```\n\n### How to Change to [OpenRouter][50] API Service\n\nYou can see the [supported models list][51], model usage can be paid by users, developers, or both, and may shift in [availability][52]. You can also fetch models, prices, and limits [via API][53].\n\nThe following example uses the free model name: `meta-llama/llama-3-8b-instruct:free`\n\n```sh\ncodegpt config set openai.provider openai\ncodegpt config set openai.base_url https://openrouter.ai/api/v1\ncodegpt config set openai.api_key sk-or-v1-xxxxxxxxxxxxxxxx\ncodegpt config set openai.model google/gemini-3-flash-preview\n```\n\n[50]: https://openrouter.ai/\n[51]: https://openrouter.ai/docs#models\n[52]: https://openrouter.ai/terms#services\n[53]: https://openrouter.ai/api/v1/models\n\nTo include your app in openrouter.ai rankings and show it in rankings on openrouter.ai, you can set the `openai.headers` in your config file:\n\n```sh\ncodegpt config set openai.headers \"HTTP-Referer=https://github.com/appleboy/CodeGPT X-Title=CodeGPT\"\n```\n\n- **HTTP-Referer**: Optional, for including your app in openrouter.ai rankings.\n- **X-Title**: Optional, for showing in rankings on openrouter.ai.\n\n## Usage\n\nThere are two methods for generating a commit message using the `codegpt` command: CLI mode and Git Hook.\n\n### CLI Mode\n\nYou can call `codegpt` directly to generate a commit message for your staged changes:\n\n```sh\ngit add <files...>\ncodegpt commit --preview\n```\n\nThe commit message is shown below:\n\n```sh\nSummarize the commit message using the gpt-4o model\nWe are trying to summarize a git diff\nWe are trying to summarize a title for the pull request\n================Commit Summary====================\n\nfeat(cmd): Add preview flag and remove disableCommit flag in commit command and template file.\n\n- Add a `preview` flag to the `commit` command\n- Remove the `disableCommit` flag from the `prepare-commit-msg` template file\n\n==================================================\nWrite the commit message to .git/COMMIT_EDITMSG file\n```\n\nOr translate all git commit messages into a different language (`Traditional Chinese`, `Simplified Chinese`, or `Japanese`):\n\n```sh\ncodegpt commit --lang zh-tw --preview\n```\n\nConsider the following outcome:\n\n```sh\nSummarize the commit message using the gpt-4o model\nWe are trying to summarize a git diff\nWe are trying to summarize a title for the pull request\nWe are trying to translate a git commit message to Traditional Chinese language\n================Commit Summary====================\n\n功能:重構 codegpt commit 命令標記\n\n- 將「codegpt commit」命令新增「預覽」標記\n- 從「codegpt commit」命令中移除「--disableCommit」標記\n\n==================================================\nWrite the commit message to .git/COMMIT_EDITMSG file\n```\n\nYou can replace the tip of the current branch by creating a new commit. Just use the `--amend` flag:\n\n```sh\ncodegpt commit --amend\n```\n\nEnable streaming output to see tokens as they arrive in real-time, rather than waiting for the full response:\n\n```sh\ncodegpt commit --stream\n```\n\nOr enable it globally via config:\n\n```sh\ncodegpt config set openai.stream true\n```\n\nThe `--stream` flag also works with the `review` command:\n\n```sh\ncodegpt review --stream\n```\n\n## Agent Skill Integration\n\nCodeGPT provides agent skills such as `/commit-message` that generate conventional commit messages from your staged changes. In [Claude Code](https://docs.anthropic.com/en/docs/claude-code), simply type `/commit-message` to analyze your staged diff and produce a well-formatted commit message with the appropriate prefix, scope, and summary.\n\nThe skill definitions are maintained in a separate repository: [appleboy/skills](https://github.com/appleboy/skills).\n\n## Change Commit Message Template\n\nThe default commit message template is as follows. The `summarize_prefix` variable outputs the conventional commit prefix with scope in `prefix(scope)` format (e.g., `feat(cmd)`, `fix(git)`, `docs(readme)`):\n\n```tmpl\n{{ .summarize_prefix }}: {{ .summarize_title }}\n\n{{ .summarize_message }}\n```\n\nChange the format with a template string using the `--template_string` parameter:\n\n```sh\ncodegpt commit --preview --template_string \\\n \"[{{ .summarize_prefix }}]: {{ .summarize_title }}\"\n```\n\nChange the format with a template file using the `--template_file` parameter:\n\n```sh\ncodegpt commit --preview --template_file your_file_path\n```\n\nAdd a custom variable to the git commit message template:\n\n```sh\n{{ .summarize_prefix }}: {{ .summarize_title }}\n\n{{ .summarize_message }}\n\n{{ if .JIRA_URL }}{{ .JIRA_URL }}{{ end }}\n```\n\nAdd a custom variable to the git commit message template using the `--template_vars` parameter:\n\n```sh\ncodegpt commit --preview --template_file your_file_path --template_vars \\\n JIRA_URL=https://jira.example.com/ABC-123\n```\n\nLoad a custom variable from a file using the `--template_vars_file` parameter:\n\n```sh\ncodegpt commit --preview --template_file your_file_path --template_vars_file your_file_path\n```\n\nSee the `template_vars_file` format as follows:\n\n```env\nJIRA_URL=https://jira.example.com/ABC-123\n```\n\n### Git Hook\n\nYou can also use the prepare-commit-msg hook to integrate `codegpt` with Git. This allows you to use Git normally and edit the commit message before committing.\n\n#### Install\n\nTo install the hook in the Git repository:\n\n```sh\ncodegpt hook install\n```\n\n#### Uninstall\n\nTo remove the hook from the Git repository:\n\n```sh\ncodegpt hook uninstall\n```\n\nStage your files and commit after installation:\n\n```sh\ngit add <files...>\ngit commit\n```\n\n`codegpt` will generate the commit message for you and pass it back to Git. Git will open it with the configured editor for you to review/edit it. Then, to commit, save and close the editor!\n\n```sh\n$ git commit\nSummarize the commit message using the gpt-4o model\nWe are trying to summarize a git diff\nWe are trying to summarize a title for the pull request\n================Commit Summary====================\n\nImprove user experience and documentation for OpenAI tools\n\n- Add download links for pre-compiled binaries\n- Include instructions for setting up OpenAI API key\n- Add a CLI mode for generating commit messages\n- Provide references for OpenAI Chat completions and ChatGPT/Whisper APIs\n\n==================================================\nWrite the commit message to .git/COMMIT_EDITMSG file\n[main 6a9e879] Improve user experience and documentation for OpenAI tools\n 1 file changed, 56 insertions(+)\n```\n\n### Code Review\n\nYou can use `codegpt` to generate a code review message for your staged changes:\n\n```sh\ncodegpt review\n```\n\nOr translate all code review messages into a different language (`Traditional Chinese`, `Simplified Chinese`, or `Japanese`):\n\n```sh\ncodegpt review --lang zh-tw\n```\n\nSee the following result:\n\n```sh\nCode review your changes using gpt-4o model\nWe are trying to review code changes\nPromptTokens: 1021, CompletionTokens: 200, TotalTokens: 1221\nWe are trying to translate core review to Traditional Chinese language\nPromptTokens: 287, CompletionTokens: 199, TotalTokens: 486\n================Review Summary====================\n\n總體而言,此程式碼修補似乎在增加 Review 指令的功能,允許指定輸出語言並在必要時進行翻譯。以下是需要考慮的潛在問題:\n\n- 輸出語言沒有進行輸入驗證。如果指定了無效的語言代碼,程式可能會崩潰或產生意外結果。\n- 此使用的翻譯 API 未指定,因此不清楚是否存在任何安全漏洞。\n- 無法處理翻譯 API 調用的錯誤。如果翻譯服\n\n==================================================\n```\n\nExample php code review:\n\n```php\n<?php\nif( isset( $_POST[ 'Submit' ] ) ) {\n // Get input\n $target = $_REQUEST[ 'ip' ];\n // Determine OS and execute the ping command.\n if( stristr( php_uname( 's' ), 'Windows NT' ) ) {\n // Windows\n $cmd = shell_exec( 'ping ' . $target );\n }\n else {\n // *nix\n $cmd = shell_exec( 'ping -c 4 ' . $target );\n }\n // Feedback for the end user\n $html .= \"<pre>{$cmd}</pre>\";\n}\n?>\n```\n\ncode review result:\n\n```sh\n================Review Summary====================\n\nCode review:\n\n1. Security: The code is vulnerable to command injection attacks as the user input is directly used in the shell_exec() function. An attacker can potentially execute malicious commands on the server by injecting them into the 'ip' parameter.\n2. Error handling: There is no error handling in the code. If the ping command fails, the error message is not displayed to the user.\n3. Input validation: There is no input validation for the 'ip' parameter. It should be validated to ensure that it is a valid IP address or domain name.\n4. Cross-platform issues: The code assumes that the server is either running Windows or *nix operating systems. It may not work correctly on other platforms.\n\nSuggestions for improvement:\n\n1. Use escapeshellarg() function to sanitize the user input before passing it to shell_exec() function to prevent command injection.\n2. Implement error handling to display error messages to the user if the ping command fails.\n3. Use a regular expression to validate the 'ip' parameter to ensure that it is a valid IP address or domain name.\n4. Use a more robust method to determine the operating system, such as the PHP_OS constant, which can detect a wider range of operating systems.\n\n==================================================\n```\n\n## Testing\n\nRun the following command to test the code:\n\n```sh\nmake test\n```\n\n## Star History\n\n[](https://star-history.com/#appleboy/codegpt&Date)\n\n## Reference\n\n- [OpenAI Chat completions documentation](https://platform.openai.com/docs/guides/chat).\n- [Introducing ChatGPT and Whisper APIs](https://openai.com/blog/introducing-chatgpt-and-whisper-apis)\n"}}}} |